
Kindom Of Iceland - 3D Digital elevation map
- made with Qgis and Blender -
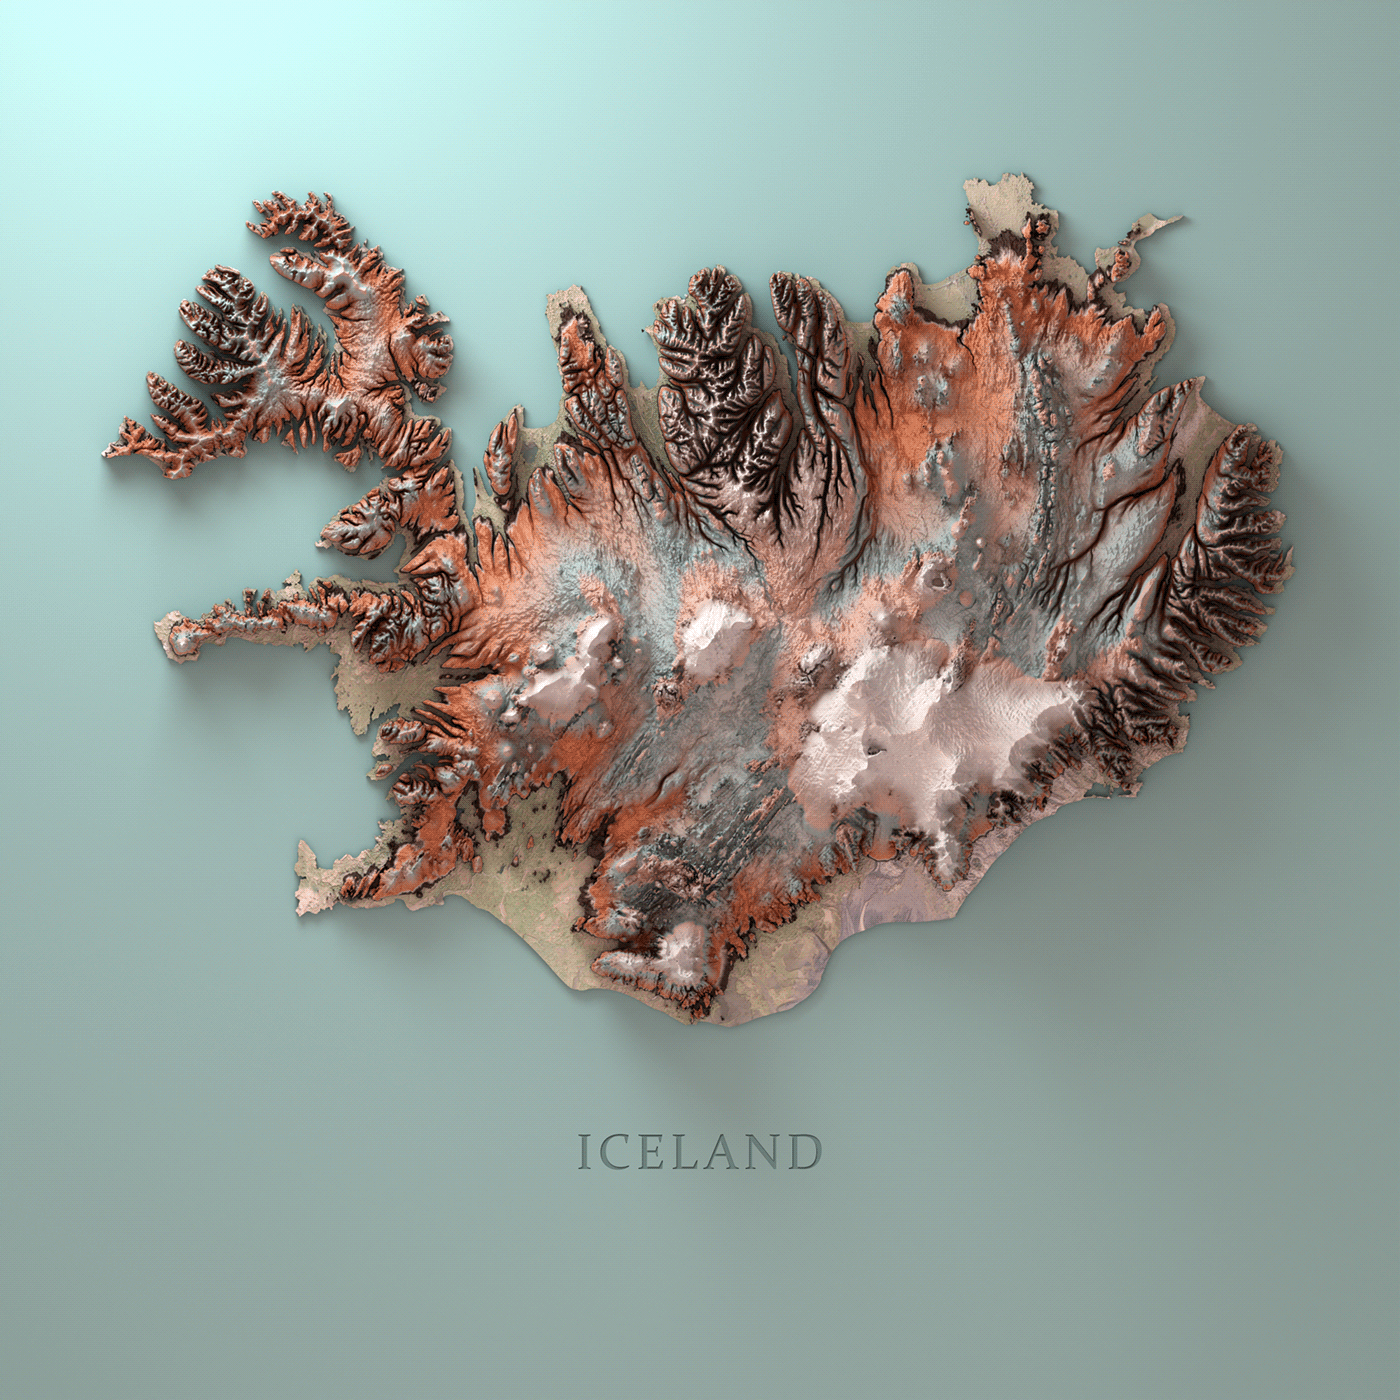
Version 1

Version 2

Version 3
Description
_______________________________________________________________________
I decided to start with a really simple visualization of Iceland as I knew too little about map creation and the software itself. I started by studying these topics first: Topography- Mapping - Elevation data, Geographic/Geospatial Informations, and then proceeded to the Qgis interface.
The reason why I am using Qgis directly and not Blender gis plugin (which I recomend), it is because of it's limitation about downloading a large amount of data, as the developer mentioned: "In the respect of these services policy, BlenderGIS limit requests to a maximum area of 400km²".
Increasing this limit by editing myself the source code did not work in my case.
Another reason, was also to get a quick and personalized access to the information I needed. Therefore, there are many free python plugins that allow you to get a lot of different data set like the waterway rivers, glaciers, population density or also roads. It's Really cool.
Another reason, was also to get a quick and personalized access to the information I needed. Therefore, there are many free python plugins that allow you to get a lot of different data set like the waterway rivers, glaciers, population density or also roads. It's Really cool.
Here's a rough explanation about the process referring to the 1st map version:
The first thing I needed is getting familiar with the Qgis interface and methods. Shapefile, geopackage, vector layer creation and basic styling options.
I've made sure that EPGS43:26 - Wgs84 was set as coordinate reference system. The project CRS, determines how data are projected from its underlying raw coordinates to the flat map rendered within your QGIS map canvas. This is usually the default.
It is important to make an appropriate choice CRS for your QGIS projects. Choosing an inappropriate CRS can cause map distortions and inadequately reflect the sizes and locations of objects relative to the real world.
I then decided an area of interest on the base map (satellite) and set a spatial bookmark. This tool allows you to «bookmark» a geographic location and return to it later. Just in case of accidental zoom in or out.
I've used a plugin called "OpenTopography DEM Downloader" to download elevations data of the chosen area.
These data comes in the form of simple greyscale image where lighter colors will be read as high elevations, darker colors as low elevations. It’s what’s commonly called a heightmap. I downloaded a high detailed SRTM 90m of my canvas size.
By exporting the DEM file, it is important to save it as 16-Bit color depth TIFF. A higher color depth will prevent the pixelated effect on your surface.

Once in blender I created a highly subdivided mesh and use the displace modifier importing the texture as heightmap and level out the ocean.
The flat base was obtained from a Multivector shape file exported from Qgis as AutoCAD .DXF format for blender.
In the 1st version, the island was scaled the on the z axis to exaggerate the depth effect. I knew already I wanted render it out from the top orthographic view.
For the shading part, I've made a node setup for coloring the Land using the object height and use an image texture for the base.
After rendering it out, I did some post processing in Photoshop.
_______________________________________________________________________


Some reference tutos:
Blender Relief Tutorial: Getting Set Up
https://somethingaboutmaps.wordpress.com/blender-relief-tutorial-getting-set-up/
https://somethingaboutmaps.wordpress.com/blender-relief-tutorial-getting-set-up/
Intro to Mapping using QGIS
https://digitalfellows.commons.gc.cuny.edu/2017/12/07/intro-to-mapping-using-qgis/
https://digitalfellows.commons.gc.cuny.edu/2017/12/07/intro-to-mapping-using-qgis/
How To Use QGIS 3
https://gisgeography.com/qgis-tutorial-how-to-use-qgis-3/
https://gisgeography.com/qgis-tutorial-how-to-use-qgis-3/
How to Create Contour Lines in QGIS
https://www.geodose.com/2018/05/how-to-create-contour-lines-in-qgis.html
https://www.geodose.com/2018/05/how-to-create-contour-lines-in-qgis.html
How to Capture World Terrain with Buildings in Blender
https://www.youtube.com/watch?app=desktop&v=-LJM-teXf4Q&feature=youtu.be
https://www.youtube.com/watch?app=desktop&v=-LJM-teXf4Q&feature=youtu.be


